Here's the apron project I did today. I guess it took between 2 to 3 hours total. If you're not a sewing-type person, this might be too detailed for your reading taste, but there are lots of pics!
This old apron that I made about 9-10 years ago, was my pattern. I like the way it fits. When I made it, I think I just came up with the bodice shape myself. I'm an eye-balling seamstress. I've used many patterns, but for making an apron, I'd rather pin and cut. Anyway, this poor old apron has a big RIP in the front -- see it? The fabric is thin.
Here's the fabric I chose. This apron is a present for Rebecca, Philip's girlfriend. She comes for a visit today. I like the starry-sky pattern.
I just lay the old apron bodice on top of the new fabric. I leave a 1/2 inch seam allowance. It's SO much easier to compute mathematically than the old 5/8".
Here are the pieces, cut out: skirt, bodice & bodice facing, 2 pockets, neck strap, two ties.
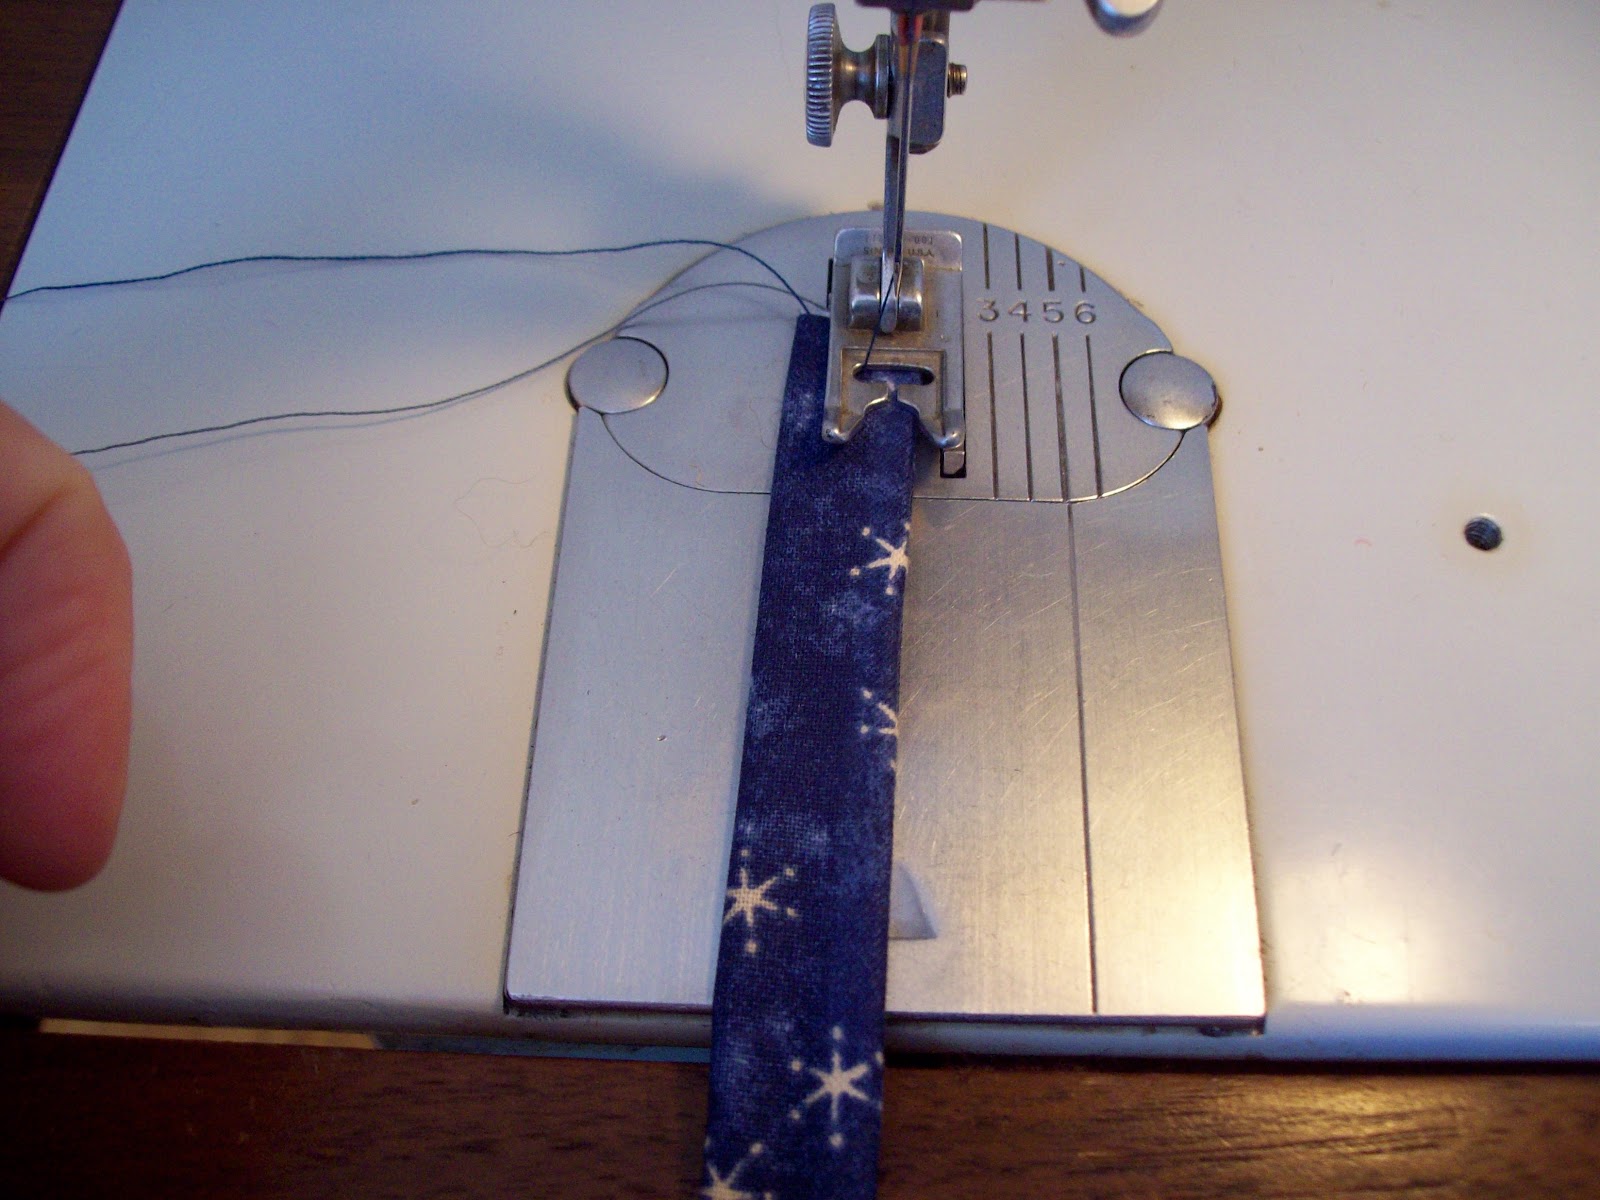
I like to get the more tedious tasks over with first, so I do the straps. Now, a pattern will tell you to sew the fabric right sides together, into a tube, and then give yourself finger-fatigue while turning it. How many horrible hours did I spend as a young woman, turning fabric tubes? Argh! No more!! Below, is a pic of the tedious-tubal-turning method.
THIS is the way I now do it: I fold in either side of the strip of fabric, and have them meet in the middle, rather like double doors closing. Then I fold it again, in half, with the raw edges enclosed in the tube.
Then I run a single line of stitching down the right-side-out tube, securing it nicely. And NO TURNING. Of course, if you're a seamstress who can't abide the sight of any stitches showing, then go ahead and pursue the arthritis.
Here you can see how the strap folds over, as I stitch it.
Next, the bodice. Lay the bodice front, and its facing (I like a facing in an apron), right sides together, and stitch the 2 swoopy sides, and the top.
Oops. Adam informed me it was time for a lunch break. He'd made his yummy French Onion Soup.
When you sew the 2 bodice pieces together (1/2" seams, remember), be sure to leave the side edges open. This way, you can go ahead and insert the waist ties now. Can you see the tie? It's under my finger. I lay it as far up as I can, near the seam, and flush with the raw edges. Fold the two bodice pieces together, and sew along that short side, securing the waist tie in the seam. DON'T sew the whole side though. Leave about 5/8" open along the bottom side.
And I'm a believer in trimming corners to remove unwanted bulk, when you turn the garment right-side-out. Nice tip. However, this is a top corner of the bodice, and as you can see, I sewed it closed, without first inserting the lovely neck strap I'd JUST made. Sigh. Like I said, I don't sew often enough to avoid stupid mistakes. I removed a little portion of the seam in 2 places, and inserted the strap fairly easily. (That wasn't my only dumb mistake, but I won't go further into that ....)
Okay. Bodice complete. All ties attached.
Now to work on the skirt. Its width is the width of the fabric, selvage to selvage. But I don't want the selvage edges to show, so I took a minute to conceal them by carefully folding them over twice, and running a seam down each side.
Then I worked on the top of the skirt, which is gathered next to the bodice. I used to do a double row of basting stitches for gathering, but I don't bother with that anymore. I eye-ball my gathering, and it works fine -- it's not really gathering; it's more like little pleats.
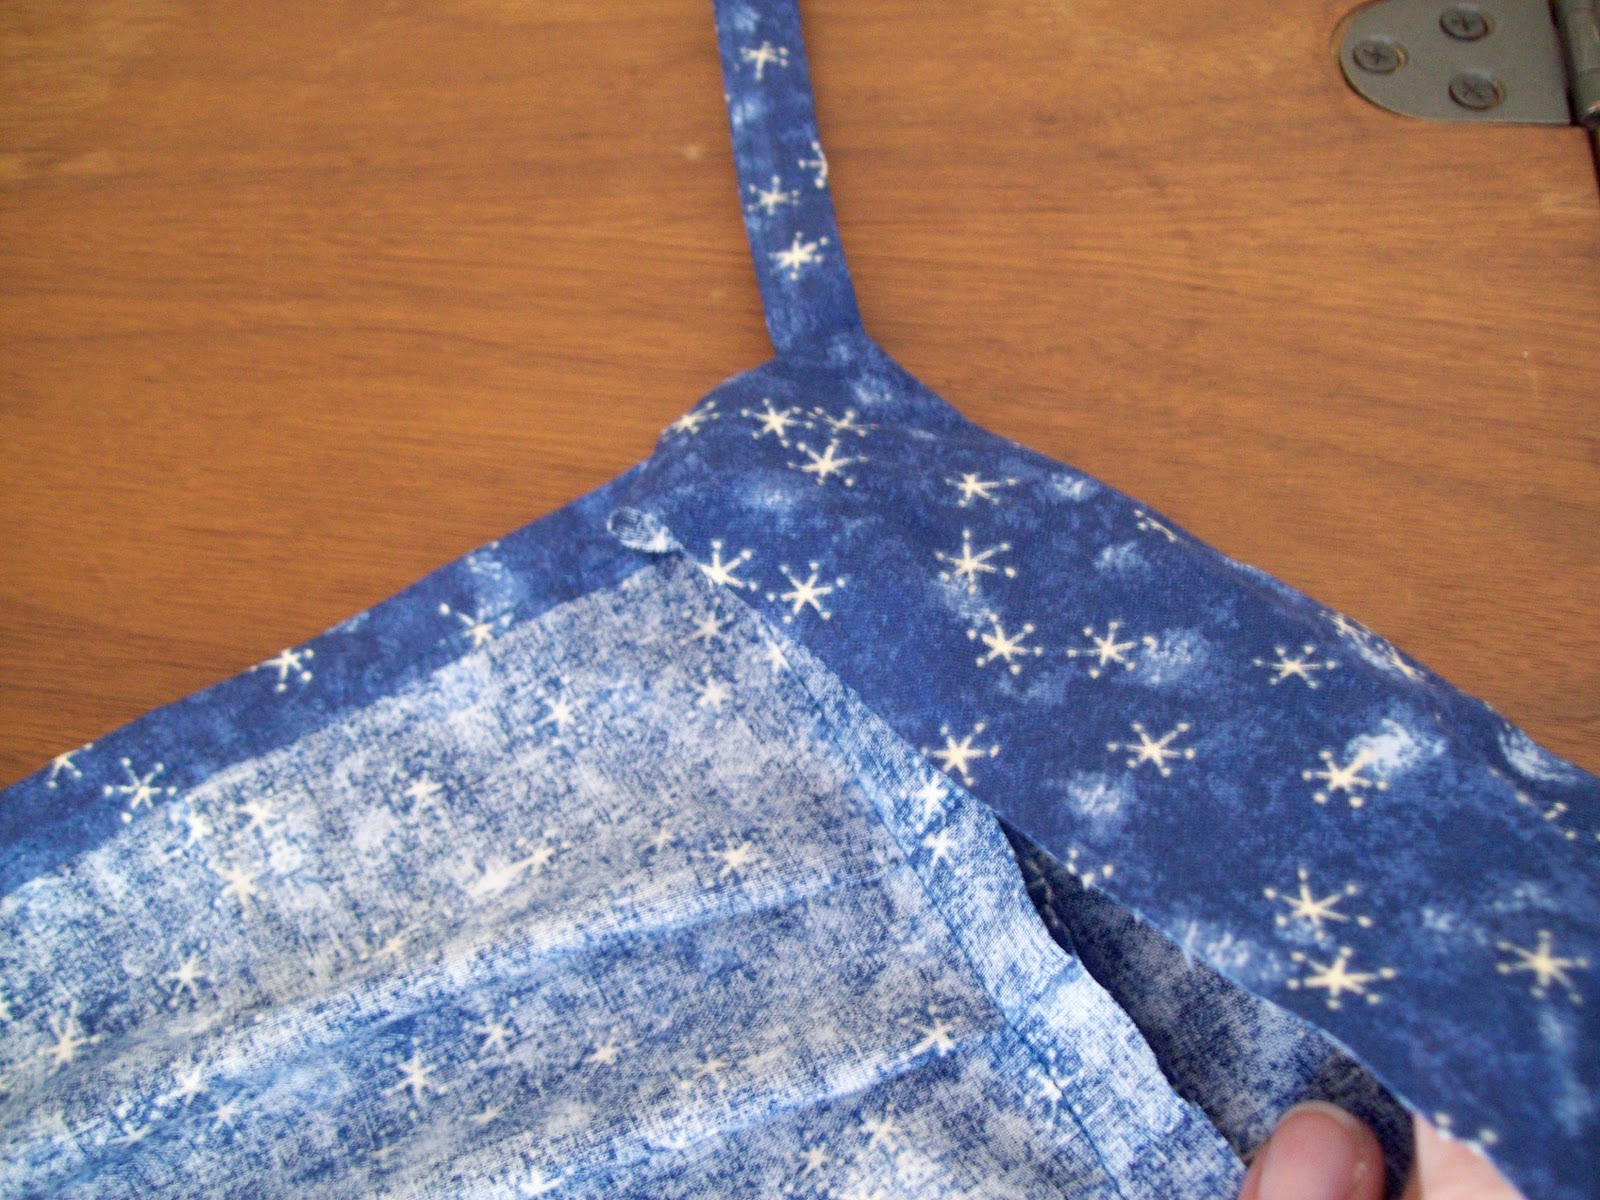
This is the slightly-tricky part: attaching the skirt to the bodice. It's just like attaching a skirt to a waistband, and once you learn how to do it, it's easy. Lots of careful pinning ensures a perfect result. Pin the gathered skirt to the bodice edge. Use a bit more than the 1/2" seam allowance. This will allow the bodice facing to come down below the joining of the skirt/bodice, and cover up the seam. Stitch the bodice and skirt together. Below, you see the skirt (left) sewn to the bodice (underneath), and the facing lying on top with its right side showing.
This is the fun, careful part. Pin the facing over the seam that connects the skirt & bodice. Turn the raw edge of the facing under about 1/4" (no raw edges), but make sure that it falls below the other seam, and covers it up. Pin the whole facing this way.
Here's a closer look:
Here's the whole bodice, pinned, from underneath.
Then, turn the apron so that its right side is up, and place it in the machine. Sew across, right at the spot where the skirt and the bodice meet. "Simplicity" Patterns used to call this "stitching in the ditch." This way (if you prefer) your line of stitching hardly shows. And because the facing fabric falls BELOW this spot, the facing will be "caught" as you stitch, securing the facing in place as well, and enclosing the whole bodice perfectly. One seam does the whole job.
The secret, of course, is in the pinning. And when I flipped my apron back over, and checked to see where that seam ended up, I was pleased to see that it lay along the bottom of the facing, about 1/8" up, all the way across. Can you see it?
I decided to do top-stitching all the way around the bodice, for security. The thread is dark, like the fabric background, so the top-stitching won't show much. And it makes the fabric edges lie so much more neatly when wearing the apron.
I wear my aprons a LOT, and I know that the weakest point on them is the place where the neck strap attaches to the bodice. So I reinforced this with a diagonal stitch at the corner of the bodice, and with 3 lines of zigzag stitching, connecting the strap and the bodice. Not particularly lovely, I know, but an apron is a serviceable piece of clothing, and this is important for its longevity.
Finished product. I also put a pocket on. Nearly forgot.
Rebecca enjoys cooking and loves to bake, so I think she'll use this particular gift. Merry Christmas!


No comments:
Post a Comment